# Set Up Task List
# Merchant account settings
You will want to create a merchant account setting in your account, to be sure that Orderwave can perform capture and refund transactions for you.
TIP
In Orderwave, you "bring your own" merchant account and connect Orderwave to it. Orderwave processes payments though payment gateways that you have already set up, or through payment platforms on marketplaces, such as Amazon or eBay.
- Click the application menu on the top-right of the screen, and choose .
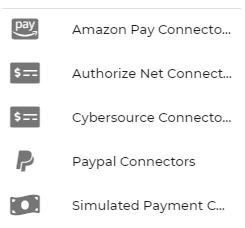
- Locate the payment gateway or payment processing platform you are using (Authorize.Net, Stripe, etc), and click on it.
Click the small ➕ button on the top right of the screen, and a box will pop up.
- The values that are needed for each payment gateway/processor vary by technology, however each of them require the following two fields:
- Merchant Id
- Merchant Description
- These are for your use inside of Orderwave, and are not used for connecting to any payment APIs - the fields for payment connections/APIs are below these two.
- The Merchant Id field is going to be your unique identifier across your organization for payments on this platform. An example might be “STRIPE-{BRAND}”, where {BRAND} is the brand/product-line you're managing. We advise that you consult with your accounting department in your company; they may already have a tracking code for transactions from this platform that they want you to use.
- The Merchant Description field is a friendly description of this payment connection for other users in Orderwave, so make it descriptive and clear.
- The values that are needed for each payment gateway/processor vary by technology, however each of them require the following two fields:
- When you’re done filling in the fields, click the “Save” button at the bottom of the window.

TIP
If you're just testing, and do not have a merchant account or payment gateway, you can use the "Simulated Payment Connector". This is a fake gateway that simulates payment processing.
# Order settings
You will want to customize some basic level settings before you start creating orders.
- Click the application menu on the top-right of the screen, and choose .
- You can edit the logic Orderwave uses to create order numbers:
- By default, Orderwave will auto-create order numbers that start with “OW”, add 9 additional numeric characters, and pad them with “0” characters.
- Feel free to customize the ‘order number prefix’ to your liking, or shorten/lengthen the length of the automated order numbers.
- You will also see a field for “fallback merchant ID”. This is the Merchant Id from the previous set-up step, and will be used as the default merchant/gateway for new orders.
TIP
Orders that come from other systems (like shopping carts and marketplaces) will already have order numbers, and will not be affected by order-number settings. Orderwave lets you store secondary and tertiary order numbers from other systems as well.
KEEP IN MIND
"Downstream systems", such as 3PL providers or internal fulfillment systems may not be able to deal with long or non-numeric order numbers, so you may want to forewarn them of any changes here.

# Return settings
Orderwave helps you automate the returns processes for your customers by creating Return Authorizations (RMAs) on orders. The settings in control the defaults for return authorizations.
| Field | Description |
|---|---|
| Return Authorization Number Prefix | This is the alphanumeric string that will start each RMA number that is generated by Orderwave. |
| Pad Number of Characters | The number of characters to pad the auto-generated numeric serial number that is created for RMA numbers. |
| Pad Character | The character to use to pad the serial number. |
| Subset Code | The default subset for returned merchandise to be returned into. |
| Warehouse Code | The default warehouse for returns to be shipped to. |
| Service Code | The default shipment service that should be used for returns. |
| Returns Accepted Days | The default number of days for returns to be accepted after the shipment has dispatched. |
| Grace Period Days | The number of days to supply as a grace period for the return policy. |
# Order sources
By default, Orderwave includes a couple of generic order sources for you: "Web" and "MOTO" (Mail-Order/Telephone-Order). These are probably not good enough for your business, so you will want to create your source codes that match the sites/marketplaces that you want to track. For example, orders from your website would be perfect here: "{mywebsite}.com", or "amazon.com".
The default source code applied to new orders is "Web". This can be overridden by Rules or your API connections.
# Fulfillers and warehouses
Your Orderwave instance will help you route and manage orders through various fulfillers (3PLs) and their warehouses. You may be doing self-fulfillment (shipping orders from your own warehouse), or using a Third Party Logistics provider (3PL); either way, you need to have at least one Fulfiller and Warehouse in Orderwave for orders and inventory to flow through.
- Navigate to the application menu, and choose .
- Click the ➕ button on the top right of the screen, to create a new Fulfiller
- Fill out the fields and click the “Create” button at the bottom of the window.

# Shipment carriers
In order to track shipments, generate shipping labels, and generate pre-paid return labels, you will need to provide Orderwave with your account details for your preferred shipping carrier(s).
Navigate to to see a list of options for carrier integration.
- Locate the shipment carrier option that you prefer
- Click the ➕ button to create the carrier integration settings
- Fill out the fields and save the settings for the carrier connector
# Using these carrier connector settings
Different shipments can be "mapped" to different carrier connector settings. For example, you may want to ship "standard" orders via FedEx Ground, and "express" orders via UPS 2nd Day Air.
To automate the mapping of shipments to carrier connector settings, you will need a Rule that updates the shipment's carrierConnectorCode field.
TIP
New to rules? Read more about rules here.
After you have created your carrier connector settings, take note of the Carrier Connector Code that you used. This will be the code that we map to new shipments.
Navigate to and create a new rule with the ➕ button. You can use anything you want for the Rule Code, but an example name might be CARRIER-CONNECTOR-CODE-MAPPING. For the rule parameters consider the following:
| Section | Description |
|---|---|
| Bucket | Choose the oms/shipments bucket. |
| Trigger | Select create as the trigger. |
| Matching properties | Match "All". Specify that this should only match shipments that are not currently mapped, so choose the field carrierConnectorCode with the operator is empty.If you want to only map shipments with certain carriers to certain connectors, such as a FedEx connector to shipments that should ship via FedEx, you can also specify the field/path shipping.service.serviceCode with the operator contains the value FEDEX. |
| Action | Choose the option Change a value, the field/path to change as carrierConnectorCode, and the value to change it to should be your aforementioned Carrier Connector Code. It is recommended that you ignore errors, should they occur, with this action. |
Save your rule parameters, being sure to activate the rule, and new orders/shipments will now be automatically mapped to your carrier connector settings.
# Return shipping labels
Create a new rule with the ➕ button for returns/RMAs. For this Rule Code, an example name might be CARRIER-CONNECTOR-CODE-MAPPING-RETURNS. For the rule parameters consider the following:
| Section | Description |
|---|---|
| Bucket | Choose the rma/returnAuthorizations bucket. |
| Trigger | Select create as the trigger. |
| Matching properties | Match "All". Specify that this should only match shipments that are not currently mapped, so choose the field carrierConnectorCode with the operator is empty.Like any rules, you can add more logic here to suit your business needs. |
| Action | Choose the option Change a value, the field/path to change as carrierConnectorCode, and the value to change it to should be the Carrier Connector Code. You can use a different carrier connector code for returns than you use for shipping. |
Save your rule parameters, being sure to activate the rule, and new returns/RMAs will now be automatically mapped to your carrier connector settings.
# Sales tax
By default, Orderwave will simply use the tax rates and amounts from orders that are loaded from your shopping carts and marketplaces. For orders placed directly in Orderwave, you may want to configure your tax differently. See the section Sales tax overview to learn more about how to configure sales-tax handling in Orderwave.