# Alert Jobs
Automated tasks allow you to create custom alerts for your team. You can create them for any bucket in the app.
Alert jobs do the following:
- Perform a search using a saved-filter on a bucket
- Identify if the results of that search should trigger an alert
- If yes, an email alert is sent out to recipients in a user group
# Create a saved filter
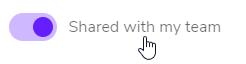
Navigate to the page for the bucket that lists results, and create a saved filter. You will use this saved-filter for your alert job, so you will need to make sure to save it and share it with your team by using the toggle-switch.
# Create alert job
Navigate to and click the ➕ button to create a new automated task. Name/describe it appropriately, and set the recurrence that meets your needs.

After creating your automated task, choose the "Alert job" task type. You will then:
- Choose the bucket that you created your saved-filter on
- Choose your saved-filter
- Choose the "count operator". This is the way that Orderwave will look at the results of your saved-filter. For example, you can set up an alert if you find zero orders from a particular source over the last 12 hours.
- Enter the number of results that will trigger the alert
- Choose the user group that will get the alert email
- Choose the "Email" alert connection
- Choose the "Alert Job Triggered" email template.
TIP
You can create and customize a new email template to match your alerting needs.
# Editing an alert job
If you need to edit the recurrence or date/time windows of your alert job, you can use the ✏ icon to edit the automated task properties directly. To change the logic of the alerts (saved-filter, counts, etc), use the "Set Properties" button on the automated task.